
So time flies and we are into November! Which means December is just around the corner....this means holidays! Parties! Food and Booze! Party time!!!
On a serious note, I'm not sure about you but I do realize that there is always lots of wastage or garbage to clear after a party. I find it so sinful. It's definitely not helping when Singapore is found to have the 7th largest ecological footprint (as per WWF). Because we are a small and successful city; a tiny dot on the map; our resources are very limited. Precisely due to the limitation, we don't really produce anything locally and rely heavily on imports. It is depressing to know that if everyone lives like Singapore, we will need 4.1 planets to sustain our livelihood.
If everyone, do their little part for the environment, I'm sure together we will make an impact. For our future generations, do use/exhaust only what you need....remember RECYCLE, REUSE, REDUCE :)
Alrighty, before I keep "nagging", here's what I wanted to show today. An altered Heineken bottle which has been given it a new lease of life by "Moi" :)
This is my very own "treasured" bottle. Why is that so? Well some of the sea shells on the bottle are actually handpicked and given to me by Gabriel. Still remember clearly when he passed the sea shells to me, he said: "Mum I picked these sea shells for you because I know you can make pretty things with it". Awww so sweet right. So now you know why it's a treasure!

Before I even started to work on the first layer, I had an array of paints in beautiful colors laying in front of me. But some how, I ended up with my favourite Prima Chalkboard Paint in Sea Breeze again! Seriously, I swear that I wanted to alter this bottle in a different color. But hey that's why they call it a "favourite color" right???
And for those who are curious to know how I get to this result. Here are some very brief steps:
- I have prep the bottle with 2 layers of gesso before putting on my Prima Chalkboard Paint.
- After the paint has dried up, I apply a layer of gel medium and quickly lay on a medical gauze to achieve the netting look.
- Once the netting of the bottle is done, I decorated the bottles with loads of yummy embellishments. For example, beads, sequins, bulb and of course sea shells etc etc.
- Last step, add on some final touches of Gold Metallic and yellow paint to complete the rustic look.
Before I end this post, I have segregated the bottle into 3 parts to give you some close up shots for a better look on the details.
 |
Love the Star Fish and Sea Horse which I have picked up from the local art store. Got it some time back but was hoarding them to find the perfect moment to use it.
Take note that I have mixed Prima Gel Medium and white paint to hold the Prima glass beads in place. This way it stays in place and at the same time has some texture to it too :)
|
 |
| Most of the sea shells you see here were handpicked by him from the beach. So this front portion ; neck of the bottle if dedicated to Gabriel. |
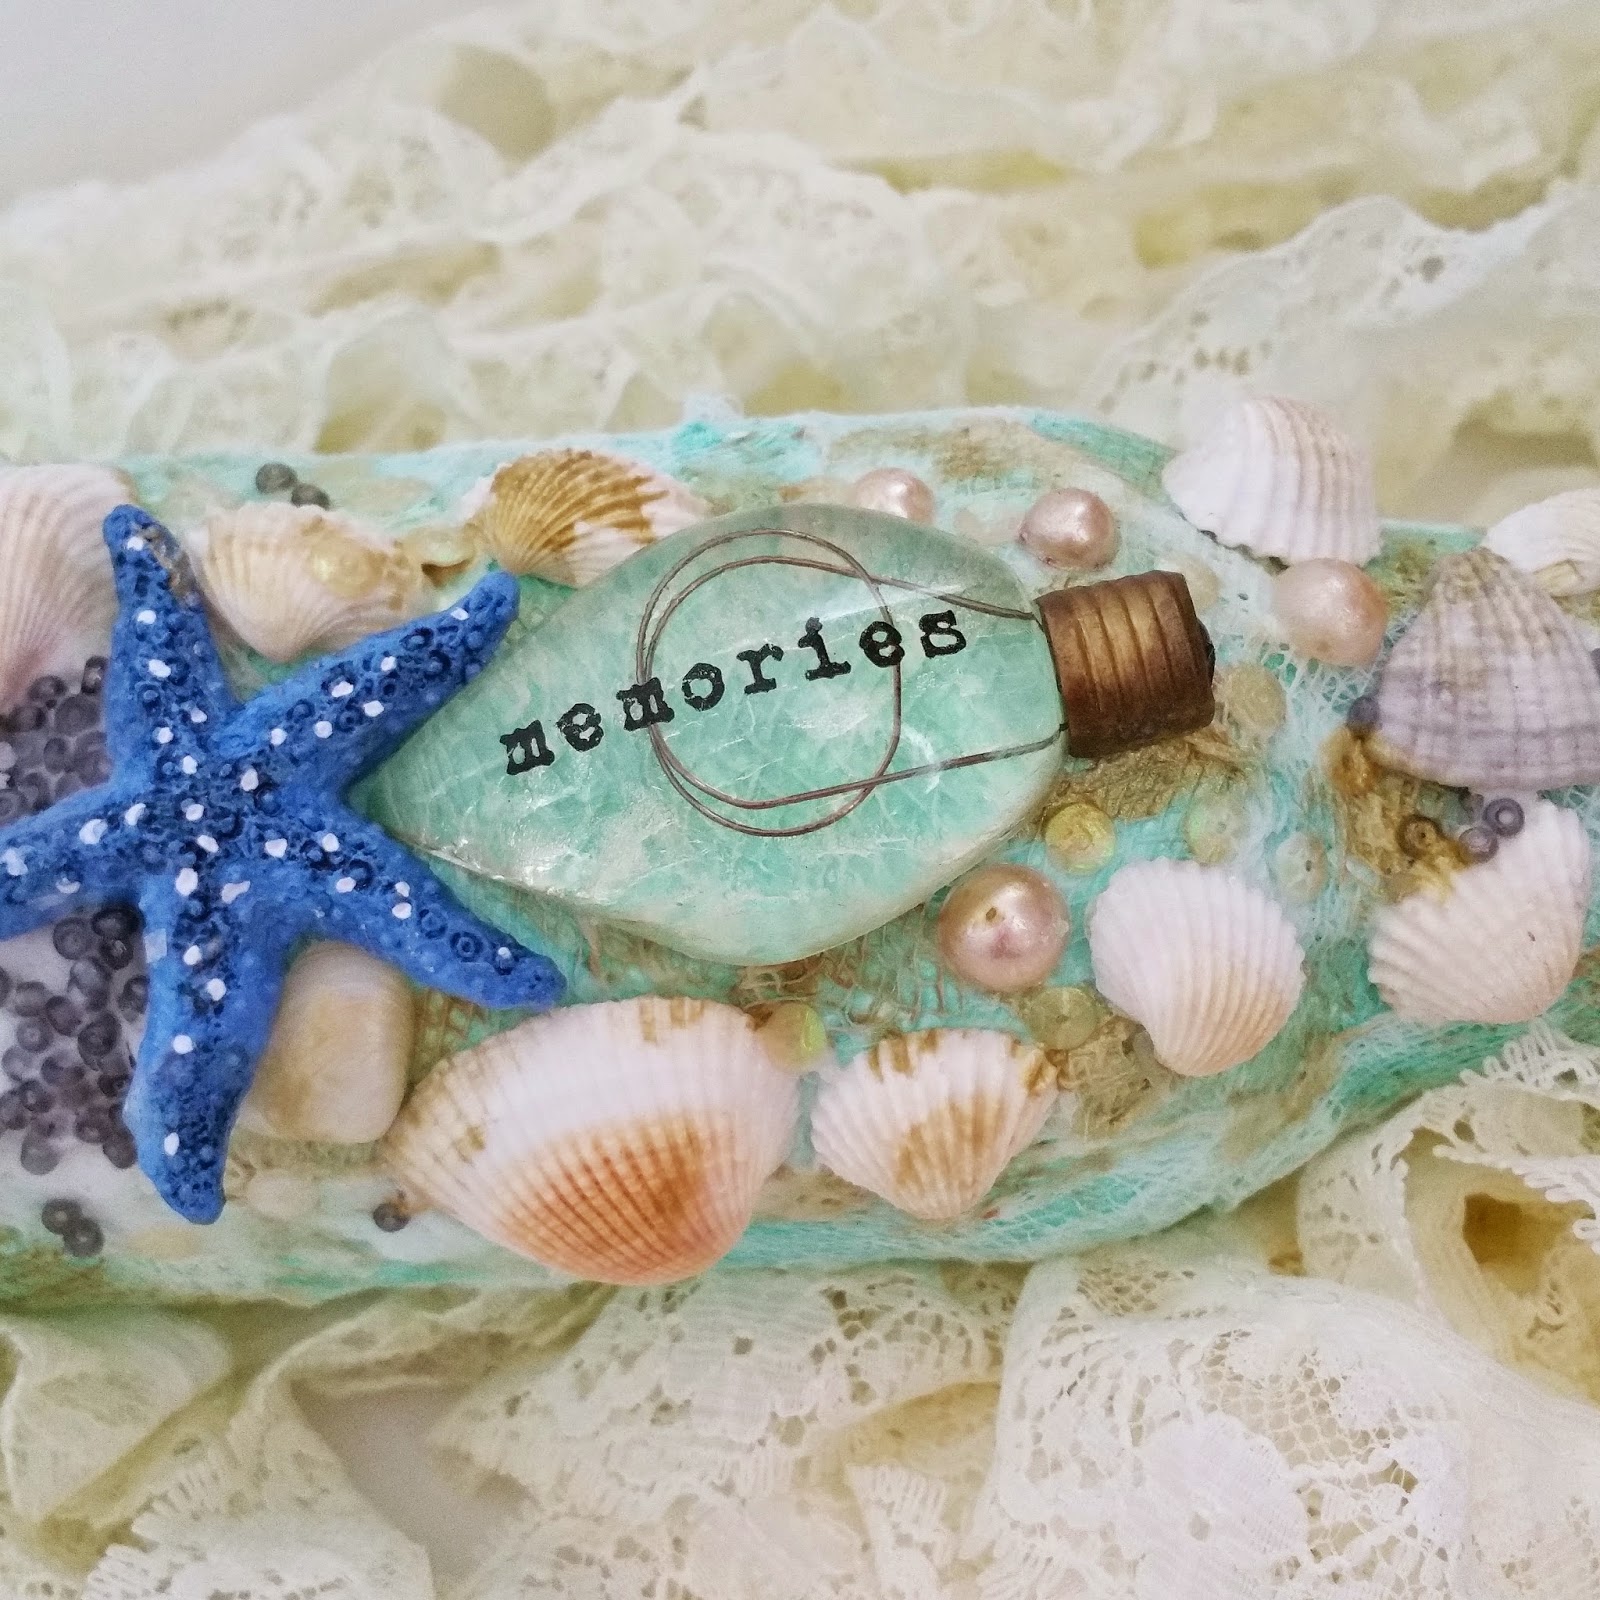 |
| Here's the middle section of the bottle. This pretty bulb from Prima is another item I have been hoarding in my craft stash. Glad I held on to it cause Prima don't come out with such pretty bulbs any more! |
So that's all I'm sharing for today!
Hope you like this creation and Happy Crafting!

2 comments:
So fun! What medium did you use to attach the shells? Love the idea of using medical gauze.
Hi Christie, I used Beacon 3-in-1 advance craft glue. For shells that don't have much stick on area due to the curve of the bottle, I have sealed them in with Prima Gel Medium.
Thanks for visiting my blog :)
Post a Comment